

In today’s fast-paced software development landscape, businesses face increasing pressure to deliver high-quality applications quickly and efficiently. Traditional development models often struggle to keep up with these demands, leading to bottlenecks, delays, and missed opportunities. DevOps, with its emphasis on collaboration, automation, and continuous integration/continuous delivery (CI/CD), offers a powerful solution to these challenges. This comprehensive guide will walk you through the process of building a robust CI/CD pipeline using GitLab CI/CD, Docker, and AWS Fargate, enabling you to automate your application deployments, improve scalability, and enhance overall development velocity. You’ll learn how to leverage these powerful tools to streamline your workflow, from code commit to production deployment, allowing you to focus on building innovative features rather than managing complex infrastructure.

This guide aims to demonstrate the creation of an automated CI/CD pipeline for a simple web application. By the end of this tutorial, you’ll have a fully functional pipeline that automatically builds a Docker image of your application, pushes it to an Amazon Elastic Container Registry (ECR) repository, and deploys it to AWS Fargate. This setup will enable seamless deployment, effortless scalability, and efficient monitoring of your application, showcasing the power and efficiency of a modern DevOps workflow. This hands-on experience will provide you with a practical foundation for building and deploying your own applications using this powerful technology stack. The practical application of this project is to demonstrate a real-world scenario of how CI/CD can be used to automate the deployment process. The benefits include: reduced manual intervention, faster deployments, improved reliability, and increased scalability. This streamlined approach allows developers to focus on code quality and feature development, leading to faster release cycles and improved product quality.
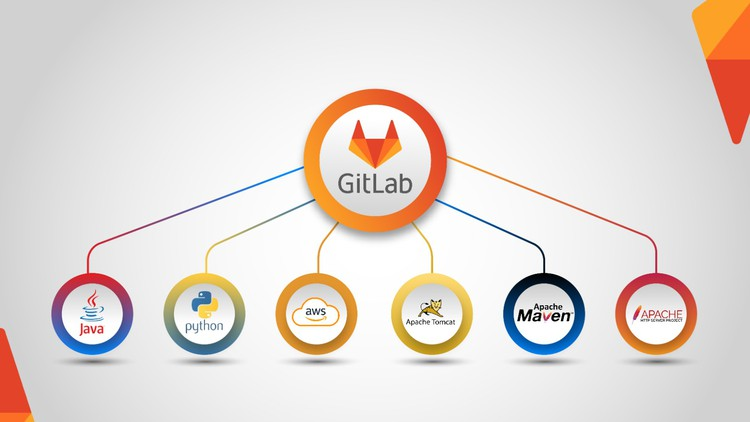
We’ll be using the following technologies:
Each tool plays a crucial role in creating a robust, automated, and scalable CI/CD pipeline. The combination of these technologies provides a powerful and efficient workflow for modern software development.

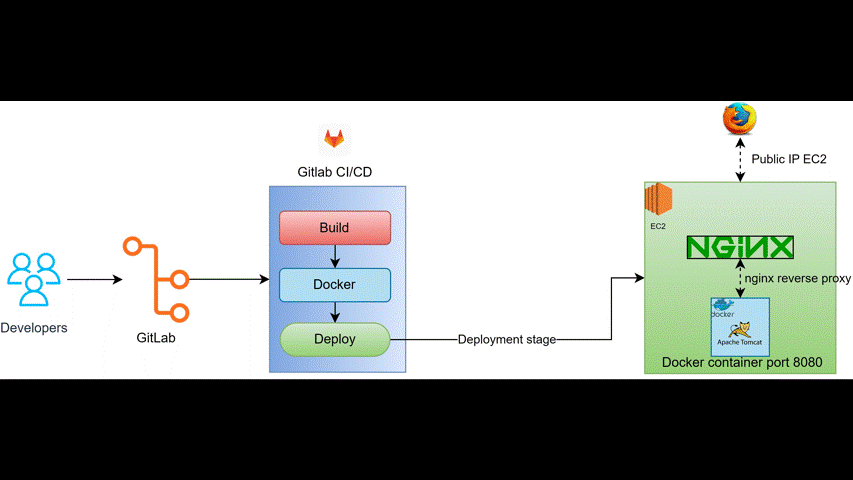
The diagram illustrates the flow of the CI/CD pipeline: Code changes pushed to GitLab trigger the CI/CD pipeline. The pipeline builds a Docker image of the application, pushes the image to Amazon ECR, and then deploys the image to AWS Fargate. This automated process ensures consistent and reliable deployments with minimal manual intervention.
Before you begin, make sure you have the following:
Having these prerequisites set up correctly will ensure a smooth and efficient process throughout the tutorial. It is essential to verify that all configurations are working as expected before proceeding to the next steps.
 Example screenshot showing the fork button on GitLab. Common issues: Ensure you’re logged into your GitLab account. If you encounter permission issues, verify your access rights to the original repository.
git clone <repository_url>, replacing <repository_url> with the URL of your forked repository.git clone https://gitlab.com/<your_username>/<your_repository>.gitThis command will download the repository to your local machine. You can then make changes and push them back to GitLab.If you made changes to the code:
git add .git commit -m "Your commit message"git push origin mainPushing updates to your forked repository ensures that your changes are tracked and available for the CI/CD pipeline. This step is crucial for triggering automated builds and deployments whenever you make code modifications.
 Example screenshot showing the ECR creation page on AWS.
aws ecr get-login-password --region <your_region> | docker login --username AWS --password-stdin <your_account_id>.dkr.ecr.<your_region>.amazonaws.com , replacing <your_region> and <your_account_id> with your AWS region and account ID, respectively. This command retrieves a login password and uses it to authenticate Docker with your ECR registry.AmazonEC2ContainerRegistryPowerUser and AmazonECS_FullAccess policies to this role. This role is crucial for granting the necessary permissions for your ECS tasks to pull images from ECR and operate within your AWS environment.Dockerfile in the root directory of your application.Dockerfile:FROM node:16
WORKDIR /appCOPY package*.json ./RUN npm installCOPY . .EXPOSE 3000CMD ["npm", "start"]This Dockerfile defines the environment for your application, copies the necessary files, installs dependencies, and starts the application. Understanding the Dockerfile is crucial for customizing it based on your application’s specific requirements.
docker build -t <your_account_id>.dkr.ecr.<your_region>.amazonaws.com/<your_repository_name>:<tag> . replacing placeholders with your specific details. This command builds the Docker image and tags it with the ECR repository URI.Tagging the Docker image is crucial for identifying and managing different versions of your application within ECR. Use meaningful tags, such as version numbers or release names, to easily distinguish between images.
Run the command docker push <your_account_id>.dkr.ecr.<your_region>.amazonaws.com/<your_repository_name>:<tag> to push the tagged image to your ECR repository. This step makes the image available for deployment to Fargate. Common issues: Check Docker authentication status if push fails. Verify network connectivity and ECR repository permissions.
awsvpcClick “Create.”FARGATEENABLEDhttp://<public_ip_address>:3000). Testing the application verifies that the deployment was successful and that the application is running as expected. If you encounter issues, review the logs in CloudWatch for troubleshooting.Create a file named .gitlab-ci.yml in the root directory of your project. Add the following configuration:
image: python:latest
stages:builddeployvariables:
AWS_REGION: <your_region>
ECR_REPOSITORY: <your_repository_name>
ECS_CLUSTER: <your_cluster_name>
ECS_SERVICE: <your_service_name>
AWS_ACCOUNT_ID: <your_account_id>before_script:pip install awsclibuild:
stage: build
script:
- docker build -t $AWS_ACCOUNT_ID.dkr.ecr.$AWS_REGION.amazonaws.com/$ECR_REPOSITORY:$CI_COMMIT_SHORT_SHA .
- aws ecr get-login-password --region $AWS_REGION | docker login --username AWS --password-stdin $AWS_ACCOUNT_ID.dkr.ecr.$AWS_REGION.amazonaws.com
- docker push $AWS_ACCOUNT_ID.dkr.ecr.$AWS_REGION.amazonaws.com/$ECR_REPOSITORY:$CI_COMMIT_SHORT_SHAdeploy:
stage: deploy
script:
- aws ecs update-service --cluster $ECS_CLUSTER --service $ECS_SERVICE --force-new-deployment --region $AWS_REGION
Replace the placeholder values with your specific AWS details. This .gitlab-ci.yml file defines the CI/CD pipeline. It specifies the stages, variables, and scripts required to build and deploy the application. Each stage performs a specific set of actions, ensuring that the application is built, tested, and deployed automatically. The use of variables allows for customization and flexibility.
AWS_ACCESS_KEY_IDAWS_SECRET_ACCESS_KEY Storing sensitive information as environment variables in GitLab ensures the security of your credentials and prevents them from being exposed in your codebase.Ensure your application logs are being sent to CloudWatch. You can configure this within your application code or through AWS Fargate settings. CloudWatch Logs provide a centralized location for storing and analyzing log data from your application, which is essential for troubleshooting and monitoring application health.
This guide provides a comprehensive walkthrough of building a robust CI/CD pipeline using GitLab CI/CD, Docker, and AWS Fargate. By implementing these steps, you can automate your application deployments, improve scalability, and enhance your overall development workflow. This approach significantly reduces manual effort, increases deployment frequency, and allows you to deliver high-quality software faster. Experiment with additional features like automated testing and database migrations to further enhance your pipeline.